Learning BPS
This document will, hopefully, teach you what you need to know to collect photo transect data and process it with BPS. It will cover:
- A step by step tutorial on how to run BPS using the included test data.
- Setting up for and conducting field work.
- Getting your data into BPS.
- Using BPS and exporting the results.
WARNING!
Please make sure you back up all your data (photos, GPS, and Depth logs) before using it in BPS. I haven’t seen it happen yet but it is entirely possible that BPS could ruin your files. This is not a commercial product and it does not come with any guarantees.
Tutorial
The following instructions will assume that you have followed the Windows Installation instruction on the BPS Installation Page unless otherwise noted. Only the paths will change for the Linux installation. The other instructions will be the same.
These steps will lead you through the process of producing a shapefile from data. We will use a few photos, depths, and positions collected off the coast of Great Barrier Island in New Zealand’s Hauraki Gulf. These data are included with the BPS installation so, if you’ve installed BPS, you already have them. The data consist of a GPS log in gpx format, a csv depth log, and 9 photos.
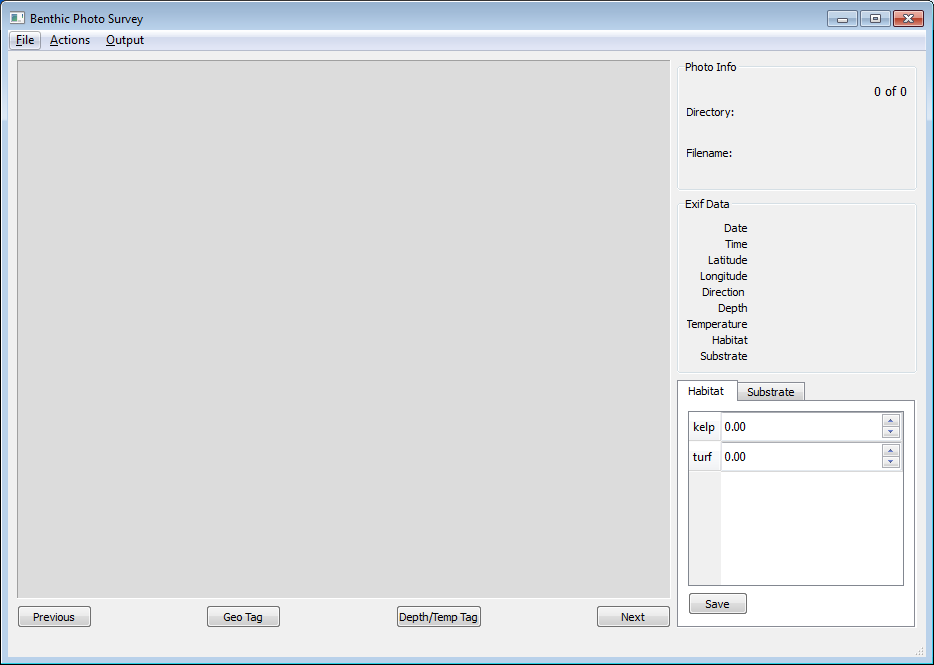
Start BPS by navigating to the bps_gui folder and double clicking bps_gui.exe. If you are using a Linux installation, you’ll navigate to bps_package and run python bps_gui.py in the terminal. When BPS opens, you’ll see something like this:
Set the general preferences for BPS. Go to the file menu in BPS and select “Preferences”. You’ll see a window with 4 tabs. Each tab will have a help button. Click the help button for information about the options presented in each tab.
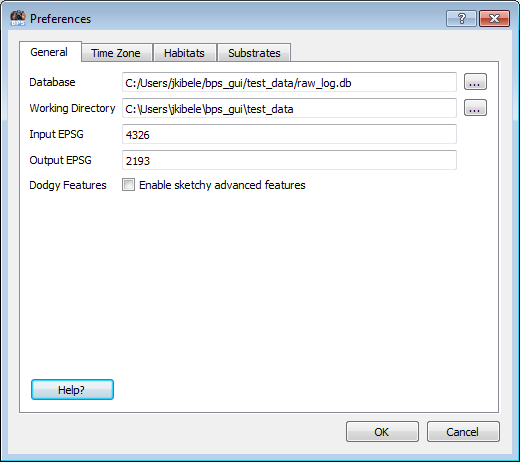
- Set the working directory. Click the ... button. If you followed the Windows Installation instructions on the BPS Installation Page, you should set the working directory to C:bps_guitest_data. If you’re using the Linux install, the test_data directory will be in the bps_package directory and you should set your working directory there.
- Set the database path. Use the ... button next to the Database field and set it to use a file called raw_log.db within your working directory. It’s fine if the file you specify doesn’t currently exist. BPS will create it for you.
- We’ll come back to the Preferences in a minute but, for now, click the “OK” button to save the changes.
Load the GPS log. Go to the file menu and select “Load GPS Log”. If the working directory was set correctly, this should open up a file dialog with the test_datagps directory. Select the file called gb_island_19092012.gpx and click “Open”. A message will be displayed (briefly) in the status bar at the bottom left of the BPS window telling you how many records were written into the database. During this step positions and time codes are read out of the GPS log and written to the database file specified in the preferences.
Load the depth / temperature log. Select “Load Depth Log” from the file menu. Assuming the working directory was set correctly, this should open the test_datasensus directory. Select the file called gb_island_19092012.csv. Another message will be displayed in the status bar and the depths, temperatures, and time stamps will be written to the database.
Load the photos. Select “Load Photos” from the file menu. Navigate into the test_dataimages directory (this should be the directory that opens by default) and click “Select Folder”. On Windows, the actual image files will (annoyingly) be invisible in this dialog but you’re selecting the folder rather than the individual images so that’s okay. Once the images have been loaded, you’ll see something like this:
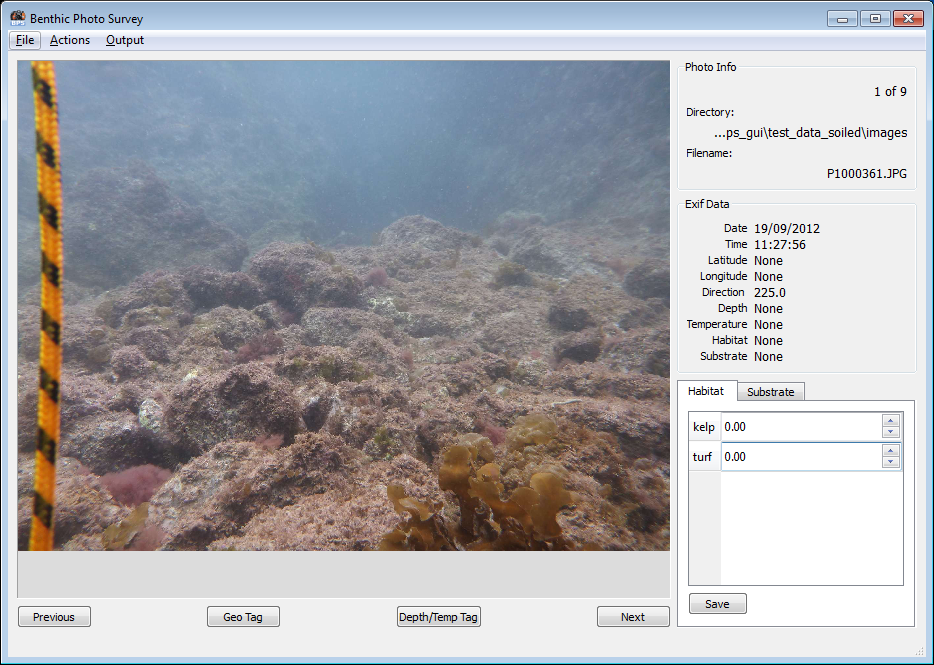
- You can use the arrow keys or the “Next” and “Previous” buttons to step through the photos.
- Notice that most of the fields in the “Exif Data” area are initially empty.
Tag the images with location and depth. You can tag all the images at once by using the “Actions” menu. Choose “Geo Tag All Photos” to assign positions. Choose “Depth/Temp Tag All” to assign depths and temperatures from the Sensus Ultra records. Alternatively, you can use the “Geo Tag” and “Depth/Temp Tag” buttons on the bottom of the BPS window to operate on just the current photo. Once photos have been tagged with position, depth, and temperature, these values will be displayed in the “Exif Data” section for each photo.
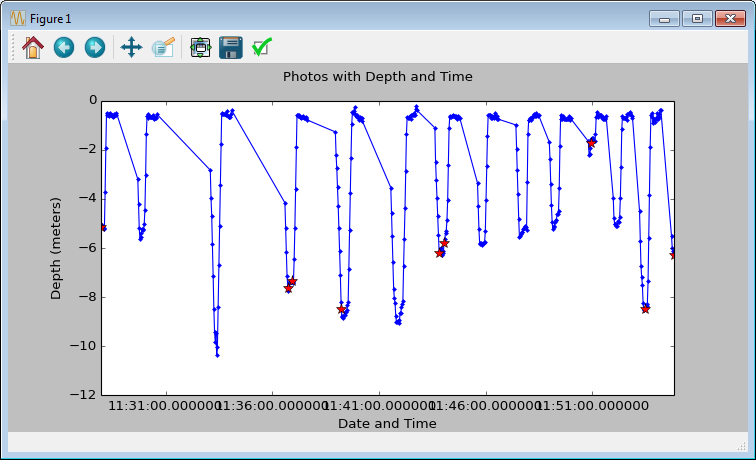
Check the depth plot. Select “Depth Plot” from the “Output” menu. This will display a plot with time along the x axis and depth along the y. The stars represent when and and what depth the photos were taken. This can be very useful for making sure the photo and depth log time codes are lining up correctly. In the case of this test data, they were captured while breath hold diving. You can see that all of the photos were taken at the lowest part of the dive. That suggests that the photo capture times lined up well with the depth log. You can zoom and pan the plot using the controls in the plot window.
Set up habitat and substrate categories. Open the preferences dialog again via the file menu. Click the “Habitats” tab. Add a couple of habitats. Click the Help button in the Habitat preferences if you need more instructions on how to add a habitat. For this example you should end up with categories of Kelp, Turf, and Sand. Click the “Substrates” tab. The default substrate categories should be fine for this tutorial but, if you’d like to change them, this is where to do it. Again, there’s a Help button on this tab that can provide more information. Click “OK” to save your preference changes and notice that the “Habitat” and “Substrate” categories on the bottom right side of the BPS window now match your specifications.
Assign Habitats and Substrates to the photos. Step through the photos (using the arrow keys or the “Next” and “Previous” buttons) and assign habitat and substrate values:
- For habitats, you assign the proportion of each habitat visible in the photo. If, for instance, you’re looking at a photo that is about 30% sand and 70% kelp, you would assign 0.3 to the sand category and 0.7 to the kelp category. To do this, position your cursor over the kelp roll box and turn your mouse wheel until the value is 0.7. Alternatively, you can type a value into the box or click the up and down arrows. The “Save” button will be disabled until the sum of your categories is 1.0. Once your values add to 1.0 and you click the “Save” button, the habitat values will be written to the Exif portion of the image. You will then see the dominant habitat type displayed in the “Exif Data” area. The dominant habitat value is the category with the largest proportion. In the event of a tie, one of the categories with the highest value is randomly chosen as dominant. The dominant habitat is just for convenience of display. All proportions are saved and will be part of the final shapefile output.
- To assign a substrate to your photo, simply click the “Substrate” tab in the bottom right corner and then double click on the substrate category of your choice. Substrate categorization does not support proportional tagging. It’s a one substrate per photo kind of thing.
Export a shapefile. This is the final product that BPS was built to deliver. Choose “Export Shapefile” from the Output menu. Navigate to where you’d like to save your shapefile and enter a file name that ends with ”.shp”. I need to change the code a little bit so that it’s more tolerant but, at the moment, a file name without ”.shp” on the end will not work.
Now that you’ve gone through all that, you should use a GIS program to take a look at your shapefile. If you’re not familiar with GIS, a good place to start is the QGIS website (where you can download QGIS) and the QGIS Documentation page.
Field Work
This section will discuss how to prepare for and conduct field work. This text assumes that you are breath-hold diving or using SCUBA. BPS can be used with a drop camera as well. If you’re going to use it that way, just use your imagination to adapt these instructions.
Initial Setup
- You should make sure you have BPS installed, running, and tested as described in Installation. It’s also probably a good idea to work through the long winded Tutorial section above to make sure you know what will happen with your data once they’ve been collected.
- As mentioned in the Introduction, you will need a float on which you can tow your GPS. For more information on making a float (and lots of other useful stuff) see the Photo Transect Manual [RP2009].
- Set your GPS tracking on and make sure the interval is short. I set mine to log position once every 4 seconds.
- Make sure your GPS datum is set to WGS84. That tends to be the default setting but you should make sure. You can use a different datum but you should make sure that the configuration file is set to match. See Configuring BPS.
- Set the logging interval on your depth sensor. It needs to be particularly short if you are free diving (or doing anything that involve fast or frequent changes in depth). I set mine to log every 2 seconds.
- Attach depth sensor to something. I generally attach it to the camera housing. I may need to compensate for the fact that the camera is usually a meter or so above the bottom when I take the photos but that seems preferable to getting the logger full of sediment.
Clock Synchronization
Since BPS will use time codes to find positions and/or depths for each photo it is essential that relevant clocks are all in sync. Before getting in the water, make sure your camera’s clock is set to the correct local time. It’s easiest to use the time display on your GPS for this purpose. The Panasonic Lumix DMC-TS4 that I use has a built in GPS that is supposed to be able to set the camera’s clock to GPS time. If you use this feature make sure to double check it. There camera clock should match the GPS clock within about a second. The depth logger actually sets the time codes when the log is downloaded from the logger. Therefore, the computer that you use to download the depth log needs to have its clock synced to GPS time when the file is downloaded. If your computer’s clock is set by the internet, this is usually good enough (in my experience) but you should double check.
NOTE: I’ve had some problems with time codes on the Sensus Ultra depth tag if I’m downloading records off it that are more than a day or two old. I think there’s a bit of drift due to the way time codes are calculated. The bottom line is that it seems to be a good idea to download the data from the depth logger as soon as possible after the field work. If you figure out that there is a time offset problem, you can enable the “Dodgy Features” in the preferences. This will allow you to time shift the depth records and to view depth plots with a time offset. Using these features, you may be able to sync your photos and depth records back up.
While in the Water
Regardless of whether you are on SCUBA or free diving, you should pause for a few seconds before taking a photo and pull down lightly on the rope you have attached to your GPS float. To get the best possible accuracy, you need the float to be directly over you. Pausing at the bottom will also minimize the effect of any clock synchronization problems for both depth and position. Also, don’t drown. That’s bad for data collection.
Back on the Surface
If you’re using a Garmin GPS60 like I am, do not save the active track. Saving the track and then downloading the saved track gets rid of the timestamp on each position rendering it useless as far as BPS is concerned. Instead, you want to download the active track. I use GPSbabel to download the track and convert it to a GPX file. Many newer GPS models output GPX files without the need for conversion. You just need to make sure you’re getting a GPX file that has a timestamp for each point within the track.
You should make backups of your photos before letting BPS operate on them. I’ve never had a problem but, since BPS is writing to part of the jpeg file, there is a possibility that it could corrupt the photo so you should have a backup.
For convenience, I keep my BPS GPS logs in working_directory/GPS and my depth logs in working_directory/sensus. For photos, I create a directory for each set of photos within working_directory/images. BPS is set up to operate on a directory of photos as a unit. For instance, when creating a shapefile all photos within the currently loaded directory will become a point in the shapefile.
Configuring BPS
Configuration is handled through the “Preferences” dialog (found in the BPS file menu). For specific details about the options, click the “Help” buttons found on each tab of the Preferences dialog.
If you are deploying more than one camera / gps / depth logger set up at a time, you will need to take precautions to avoid confusion. You will need to change the db_path in the preferences and keep the logs from the two setups separate.
References
| [RP2009] | Roelfsema, C., Phinn, S.R., 2009. A Manual for Conducting Georeferenced Photo Transects Surveys to Assess the Benthos of Coral Reef and Seagrass Habitats version 3.0. |